Cleaning Sardines

Now this post is not for the faint hearted – I am sorry if this offends anyone, it’s certainly not my intention.

Following on from my post about Sardines a la Marocaine. this is how you clean the little morsels. I have discovered in doing it for the second time that you can actually feel that the rib area is quite soft in comparison to the rest of the fish and that you can pretty much remove everything that needs to be removed in one fell swoop or slice as the case may be. Any questions just ask… but I do need to say I am no expert!

Chelsea Buns

So as you know we’ve been making things of late that would be good for the kidlets in their lunch boxes or for an afternoon snack, it definitely depends on how old your children are, but if they have afterschool activities you may be running short of ideas, which was how this little project came about. My main concern was that whatever you offer them it has to be healthy, tasty, and easy to pack and more than likely taste good cold.

I have had a week of experimentation and this is what I’ve come up with. Definitely tasty & good cold, relatively easy to make, you can get the children involved in the making of & not too sweet, I figure if you’re making these yourself you know what’s gone into them and therefore every now and again something sweet is ok.

This recipe originally comes from The Essential Baking cookbook. But you might have gathered by now that it’s very hard for me not to play around with recipes. I usually buy yeast in a large container which I keep in the fridge, ours has been there for a while now so I have been using a bit more than the recipe indicates, I also made my own mixed fruit with sultanas, apricots and some candied peel I made when oranges & lemons were in bountiful supply.

If you have a dough hook on your mix master then use this and make the yeast mix in your mix master bowl so you’re just using the one bowl.

Chelsea Buns

You will need:

2 tsp dry yeast

1 tsp sugar

2 ½ cups plain flour, sifted

½ cup warm milk

185g softened butter

1Tbsp sugar, extra

2 Tbsp mixed or candied peel, finely diced

1 tsp mixed spice

1 egg

¼ cup soft brown sugar

1 cup mixed dried fruit (you could use anything along the lines of dried apples, sultanas, apricots, peaches etc)

1 Tbsp milk, extra for glazing

2 Tbsp Sugar, extra for glazing

Glace icing

½ cup icing sugar

1-2 Tbsp milk

What to do:

Combine the yeast, sugar & a couple of tablespoons of the flour in a large bowl, add the milk and mix well. Set aside in a warm place until it’s frothy and thick. This should take about 10 minutes.  While you’re waiting for the yeast to activate sift the remaining flour into another bowl and rub in 125gms of the softened butter with your fingertips until it resembles coarse sand or breadcrumbs. Stir in the extra sugar, mixed peel & ½ the mixed spice. Add this to the yeast mixture with the egg and mix well using the dough hook on your mix master. Work the dough until it comes together to form a smooth ball.

Lightly oil your mixing bowl put the dough in and cover with cling film and place in a warm place to allow to prove for an hour or until it’s at least doubled in size.

Pre heat your oven to 210°C 415°F or gas 6-7. Ensure your mixed fruit is finely chopped if you’re making your own. Beat the remaining butter with the brown sugar & mixed spice until it’s light & creamy. When your dough is ready, knock it back and roll out to approx 40 x 25cm (16 x 10 inches) rectangle, Spread the butter mixture all over the dough to within 2cm of the edge of one of the longer sides, sprinkle the fruit all over the dough.

Roll the dough from the long side, firmly and evenly to enclose the fruit. Using a sharp knife cut the roll into evenly sized pieces about 2 ½ cm thick. Arrange the slices onto a well greased oven tray with the seams facing inwards. Flatten slightly, cover with cling film and set aside to rise for 30 mins or until they’re well risen again. Bake for 20 minutes or until golden brown & cooked. When they’re almost ready stir the milk & sugar in a small saucepan over a low heat until the sugar is dissolved, brush this mix over the hot buns. Cool & mix the icing sugar, drizzle over the buns. You should get about 12 – 15 smallish buns.

Cheesymite buns, pizza buns, savory buns

So these are the variations on the Chelsea Bun mix, it definitely works equally as well & they taste delicious cold. I’d love to hear if anyone has a go at making these and how they go down with the kids/family. Obviously most of the things we’re recommending for kids would work for lunches to take to work as well.

Savory Buns:

You will need:

2 tsp dry yeast

1 tsp sugar

2 ½ cups plain flour, sifted

½ cup warm milk

185g softened butter

1 egg

2 cups grated cheese – tasty & parmesan depending on the flavours you like

½ a Spanish onion, finely diced

20 green olives, diced

4 Tbsp Tomato paste or Chunky Sweet chili dip

What to do:

Combine the yeast, sugar & a couple of tablespoons of the flour in a large bowl, add the milk and mix well. Set aside in a warm place until it’s frothy and thick. This should take about 10 minutes.  While you’re waiting for the yeast to activate sift the remaining flour into another bowl and rub in 125gms of the softened butter with your fingertips until it resembles coarse sand or breadcrumbs. Stir in the extra sugar, mixed peel & ½ the mixed spice. Add this to the yeast mixture with the egg and mix well using the dough hook on your mix master. Work the dough until it comes together to form a smooth ball.

Lightly oil your mixing bowl put the dough in and cover with cling film and place in a warm place to allow to prove for an hour or until it’s at least doubled in size.

Pre heat your oven to 210°C 415°F or gas 6-7.  When your dough is ready, knock it back and roll out to approx 40 x 25cm (16 x 10 inches) rectangle, mix the remaining butter with either the tomato paste or dip and spread  all over the dough to within 2cm of the edge of one of the longer sides, Scatter the cheese, onions & olives over the dough.

Roll the dough from the long side, firmly and evenly to enclose the toppings. Using a sharp knife cut the roll into evenly sized pieces about 2 ½ cm thick. Arrange the slices onto a well greased oven tray with the seams facing inwards. Flatten slightly, cover with cling film and set aside to rise for 30 mins or until they’re well risen again. Bake for 20 minutes or until golden brown & cooked. You should get about 12 – 15 smallish buns.

Variations:

I did half & half with cheese & vegemite and the above recipe.

You could also substitute the tomato paste for pesto and the onions & olives for semi sun dried tomatoes.

Black Olive tapenade, crumbled feta & diced pumpkin which have been pan fried until golden. Reduce the grated cheese to 1 cup.

Tomato paste, salami sliced into strips, diced kalamata olives.

Freshly chopped herbs like oregano, parsley, sage & thyme. Even cheese & garlic.

After school or anytime snacks for kids

A very dear friend of mine has two boys with somewhat hectic after school activities and asked for some more ideas as to what to feed them for afternoon tea. As anyone with children will know that idea of 6 small meals is not such a bad idea, particularly come mid afternoon. It’s a sure-fire way to keep little minds focused & happy and little tummies full as googs. I’m thinking that some of these ideas are suited to older children who have sporting activities after school and really need some sustained energy.

This project has reminded me of when I was looking after my grown up cherubs (as a nanny) in New Zealand & I’d pick up Mackie & Erin after school & we’d wait about 20 – 30 mins for Jay to finish so I would take afternoon tea and everyone would eat in the car, I used to check their lunch boxes and if they (Erin) hadn’t eaten her piece of fruit, she had to eat that one & then another one & then she could have a choc chip cookie or muffin, generally I’d take them fruit, cucumber, capsicum or carrots & something sweet. It was enough to keep them going until dinner time. Anyway I put my thinking cap on, tested a few recipes and consulted friends with kids as to what they serve their little ones come afternoon tea time. I also thought a little outside the square.

We’ve, because I haven’t done this alone come up with some mostly healthy, fun and hopefully yummy ideas.

Hot weather snacks:

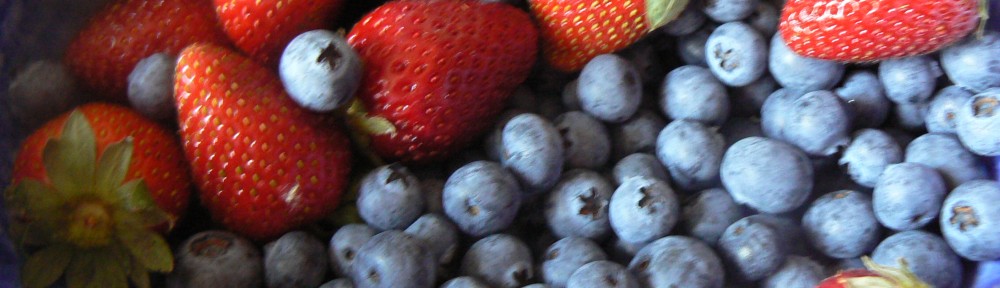
Obviously fresh fruit is a given and coming into summer there are so many options, mango, watermelon, grapes (fresh or frozen) peaches, apricots, nectarines, blue berries, strawberries, kiwi fruit (although not too many as it can cause rotten nappies in little ones & yes I am speaking from experience)

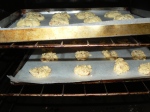
Muffins are a great option as you can add grated apple, sultanas, seeds etc and have a bit of a play around. Banana muffins are a definite winner with the kids & adults I know. (But maybe wait until the prices go down a bit more)

Fruit smoothies in insulated cups can be made from pretty much anything, best way to save money is to use whatever fruit is in season, add milk & some yoghurt and Vvvvvvvvvvvdddddddd blend away. I remember when we were in Marrakech we used to freeze little containers of yoghurt, normally I wouldn’t advocate buying the little containers of yogurt as they are more expensive, but for the convenience I figure it’s worth it, you could always transfer the yoghurt into smaller containers.

Cooler weather snacks:

I made some mini pizza’s today which all the kids in mother’s group seemed to enjoy and the best thing was that they tasted good warm or lukewarm to room temp which means they may even work for lunches too.

Sausage rolls, party pies, soup in thermal mugs and I was even thinking porridge with sultanas, dried or grated apples & cinnamon would work, particularly in winter & for those kids who are playing sport and need something to keep them going. You’d need to put it in a thermos or thermal cup to keep it hot.

I thought about meatballs, but really I do think they need to be warmer to hot to still taste good.

Other snack type things could be olives (yes kids love them or the ones I know do) Hummus, tzatziki, Mashed Avocado with some lemon juice to stop it from going brown. Little bread sticks, Pita breads with falafel, cucumber, carrot, capsicum sticks. Banana & Peanut butter on raisin bread. Cheese & vegemite on saladas or any dried biscuit, cherry tomatoes, kabana, hard boiled eggs. Little tins of tuna (or buy a big tin and break it up into smaller containers.

I think this is definitely an area where any other suggestions are welcome and much sort after as we all want to try to ensure our kids are eating healthily and give them variety, nothing worse than the same thing every day. If we can get them involved in the cooking & preparing of the food then they’re more inclined to eat it.

There is a great magnet we got from the maternal health nurse which reads, we decide what they (the children) eat and when they eat, they decide whether to eat and how much. It’s a rocky road at the best of times and everyone has an opinion about  this subject. There will be days when all they eat is pasta or only green things or perhaps nothing at all. However I do think as long as for the most part your children are eating relatively healthily then the occasional packet of chips or icypole isn’t really going to hurt. Everything in moderation as they say.

Sardines a la Marocaine

Yesterday at the market they had sardines for about $5.50 a kg, okay so I had to clean & gut them but I figured even with 2 kids in tow I could give it a go and knowing how much Hafid LOVES them I figured it was worth the effort. $5 got us 28 of the little suckers!

The fish monger showed me how to clean them and I used that one as my guideline. It really wasn’t as hard or as disgusting as I thought it would be, I was very thorough though and removed the poo tube as well.

Gave them a good rinse and put them back in the fridge until dinner time.

Sardines are a wonderful fish especially if you can get them fresh and these little babies were so fresh, their eyes were lovely and clear – crystal in fact – which is the sign of a fresh fish and they smelt lovely and salty like the ocean. Again another good indicator of freshness.

Because they’re so delicious & fresh I went with the simple way to cook them, I made some chips (still trying to master them – I think it’s all in the spuds but that’s another post) a salad and the sardines.

You will need:

Fresh sardines 1kg was enough for us (2 adults & 2 kids)

1/2 cup plain flour

2 tsp salt, ground cumin & paprika

Pepper

Oil for frying.


After you have cleaned the fish combine all the spices and flour in a bowl, heat your oil to just before smoking point and dust the fish in the flour shaking off the excess. Fry them in batches, you can pan fry them or deep fry which ever you prefer. Cook until golden and enjoy!

I promise, hand on my heart our 2 children loved them, Zachie is 3 1/2 & Sophia is 15 mths and they had a field day, I did remove them from the bones for them, but if you’re game you can just nibble away and all you’re left with is the bones in the middle.

I will try to make a video or at least photo’s of how to clean a sardine, because we’ll be having these again!

Pizza Perfection!

So Friday night came around very quickly last week and I was in the mood to make some pizza, it became a slightly drawn out affair, but that went well for the dough which rose to the occasion perfectly.

I had picked up some bocconcini at the wholesalers and thought…Yep on pizza that will be lovely. We had some left over eggplant from dinner a few nights before, add some freshly sliced mushrooms & olives, home made tomato sauce, cheese and voila dinner is served.

You will need:

For the dough – this amount will make enough for 3 good sized pizzas

25gm fresh yeast or 1 Tbsp of dried yeast

1 tsp runny honey

500g plain flour (if you have it you can use Tipo 00 flour which is great for pizza bases but it’s not essential.

1Tbsp Extra Virgin Olive Oil

2 tsp sea salt

375ml lukewarm water

Crumble the yeast into a bowl with the honey and water, mix well and set aside in a warm place. Sift the flour and when you can smell the yeast and see bubbles or foam on the top it’s ready to add the flour to along with the salt & olive oil. Mix well until it forms a smooth ball (if you have a dough hook on your mixer you are in luck). You may need to add a little extra water or flour, if the dough is too sticky or dry, you want the dough to be soft & slightly stick, but not dry. Cover & leave the dough to prove for at least 10 minutes or until it’s doubled in size.

If you like your pizza bases thin, knock back the dough and divide into 3 pieces, roll out, place on greased trays that have been sprinkled with a little semolina and proceed with your toppings.

If you like a thicker pizza base, knock back the dough and divide into 3 pieces, roll out, place on greased trays that have been sprinkled with a little semolina and set aside to rise for at least an hour in a warm place. Then proceed to top your pizza’s.

For the toppings:

Really it’s up to your imagination & taste buds, I made a mushroom & olive pizza & eggplant & bocconcini. I had made my own tomato sauce with onions & garlic (I had made a lot for a party we had on) but you can quite easily use tomato paste, an italian herb mix or fresh herbs.

Capsicum, Proscuitto, Cheese, olives, artichokes, salami etc, all the standard toppings work, but generally for a traditional italian pizza limit your toppings to no more than 4 not including cheese & tomatoes.

For something a bit different & very special try Buffalo mozzarella & freshly chopped parsley, basil, oregano & thyme with lemon zest & garlic, mix it all together and sprinkle over the cheese.

You want your oven to be as hot as you can get it to start with and then when you put in the pizzas turn it back to about 220 degrees celsius. Cook them until golden and enjoy!

Tips: Don’t forget to season your pizzas with Salt & Pepper, unless you’re using extra salty things like feta & anchovies. Put the cheese on the bottom and for an extra hit of flavour mix tasty, mozzarella & parmesan or pecorino together. If you have a pizza stone use it or buy a couple of terracotta tiles (as per Gary from Masterchef) and use semolina as your base as this really does help to prevent your pizza’s from sticking to the trays, alternatively if you’re making quite a few you can have them waiting to go into the oven on baking paper which makes it much easier to move around and onto the trays.

Oh and did I mention my Dad is building a wood fired oven! 😀

Lamb, Potato & Capsicum Tajine

Our idea of reducing red meat is coming along quite nicely and tonight is the first night in 10 days that we’ve had red meat for dinner. I tried a slightly different approach which did raise the eyebrows of the purist in our house along the lines of not messing with the way you cook Moroccan food. I didn’t really mess with it, I just tweaked a few things to spread the flavour around a bit more. Usually when you cook a tajine the ingredients are layered.

Onions & spices, carrots, meat, potatoes, capsicum, tomatoes. Today I mixed everything together in a bowl first so all the vegies were coated in the spices and then just put the meat & onions in first with the vegies on top, worked a treat and was delicious.

You will need:

2 brown onions

4 medium size potatoes

1 red capsicum

1 large tomato

4 lamb fore quarter chops

1/2 cup chopped coriander

1/2 cup chopped Italian parsley

3 tsp ground cumin

4 tsp paprika

3 tsp salt

freshly ground black pepper

1/2 cup water

3Tbsp Olive Oil.

Dice one of the onions and cut the other into bite size pieces, peel the potatoes, cut them, the tomatoes & capsicums into bite size pieces. Put all the ingredients into a large mixing bowl with all the spices & herbs, but not the oil or water.

Place a large pan that has a lid over a medium heat and add the oil, give the ingredients a   good mix with your hands and place the meat pieces & onions into the pan to brown. once they’ve browned slightly on one side, turn over and add the remaining vegetables. Push the potatoes down into the pan, keep the capsicum & tomatoes on the top, add the water and cover, reduce the heat to a gentle simmer & cook for approx 40 mins, you want the liquid to reduce to almost nothing.

A couple of tips: When you add tomatoes & capsicums to a tajine, don’t be tempted to add more water as the liquid from all the ingredients will be released. I use Murray river salt flakes and call me crazy but for some reason they don’t seem as salty as other salt which is why I’ve added 3 teaspoons.

This recipe would easily feed 4 people with 1 chop each, it’s very simple to increase the quantities if you wish to people to have 2 chops each. Just increase the spices by adding an extra 2 tsp of each. You can use any cut of Lamb for this, but I do like to use meat on the bone as I believe it adds more flavour, you could use barbeque chops or diced lamb as well.

Almond Shortbread

Zachie has a best friend from kinder so we made some biscuits to take for morning tea when we went to play there last week. These biscuits are gorgeous, easy to make and you can quite easily change them from Almond shortbread to Lemon Shortbread but swapping the Almonds for Lemon Zest.

I do like the rustic look of just taking little clumps of the mix and baking them, but you can roll them into balls and press them down with a fork if you want something more uniform.

You Will Need:

250g Butter, softened

3/4 Cup Caster Sugar

2 Cups Plain Flour, Sifted

1tsp Vanilla Essence

100g roasted Almonds, roughly chopped

Pre heat your oven to 170 degrees celsius. Cream the butter & sugar until it’s really light & fluffy, add the vanilla essence mixing to combine. Sift the flour over the mix and beat slowly ensuring it is well combined. Tip in the chopped almonds and mix well. Refrigerate for about 5-10 mins.


Either roll or shape into 2-3 cm balls and place at intervals on a baking tray lined with baking paper. Bake in a moderate oven for 10 mins or until just golden, allow to cook before storing. This recipe makes approximately 20 -30 biscuits depending on the size.

Moroccan style beans with tomatoes aka baked beans

So we have had a week of no red meat which has gone really well, and I haven’t missed it at all, I don’t think Hafid has either. It’s been a bit more challenging from a what to cook view-point but that’s always good.

I have also had to take into consideration that beans mean gas and with a toddler that’s not always a good thing, so I cooked the kids pasta (which they devour) and they then proceeded to devour the beans as well. Hafid & I love this dish, it’s quick, easy, tasty & very good for you. You can serve it as dinner, a side dish with Rice, Polenta or Potatoes (but don’t tell H I told you that) we have it with crusty bread to mop up all the sauce and you could have sausages, steak or something similar with it if you like.

I should probably provide a warning with this recipe due to the effects of beans on one’s digestive system 🙂 but really it’s worth the risk! Oh & I don’t think you’ll eat canned baked beans again because these have FLAVOUR!

You will need:

1 medium brown onion, finely diced

2 tins of crushed tomatoes, pureed

1 clove of garlic, crushed

2 tins of cannelli beans, rinsed

1/2 preserved lemon, rinsed but keep the flesh intact

1tsp ground cumin

1tsp smokey paprika

Salt & Pepper to taste

Olive oil

In a large saucepan heat the olive oil and saute the onions, garlic & spices until the onions are translucent. Don’t add the salt or pepper at this stage. When I used tinned tomatoes I always add some water to the tin to get all the tomatoes, add that water to the tomatoes when you puree them. Add the pureed tomatoes and bring to the boil, reduce the heat and simmer for about 15 mins or until the sauce starts to thicken. Add the beans & preserved lemon stirring to combine and again bring to a simmer. Cook for another 10 -15 mins. Taste the beans & check for seasoning, you probably won’t need to add any extra salt as the salt from the preserved lemon should be enough.

Pour/ladle the beans onto a serving plate & serve with crusty bread – go Moroccan and get into it and eat with your hands using the bread as a spoon.


No Red Meat this week.

Monday night was an easy dinner evening, the kidlets had porridge at their or Zachie’s request. We had chicken thighs marinated in chermoula with rice, all too easy and low fuss.

This week we are having a reduce the red meat intake challenge, so I am thinking up recipes that either are vegetarian or fish. Tonight we’re having a lovely bean & tomato tajine/cassoulet best of all Hafid’s cooking it, it’s gorgeous and the recipe will follow, we’ll have it with bread, but you can have it with rice, it’s a bit like baked beans, but they’re not baked.

It’s going to be an interesting week, I won’t miss the red meat, but I am wondering how Hubby will go.. we’ll keep you posted.