Homemade Beef, Onion & Mushroom Pies

I think it was a couple of Master Chef seasons ago, Zachie and I were watching Gary make pies. They looked amazing, great for winter and who really doesn’t love a pie? Pies for us were our “we’re home late and the kids need to eat now” meal and I was buying nibble pies aka party pies from Aldi which were great. But in the back of my mind were a couple of things. Firstly they’re not the most nutritious thing ever and heaven only knows exactly what they’re made of. So I thought I am going to have a go at making Gary Mehigan’s pies. You can find his recipe here.

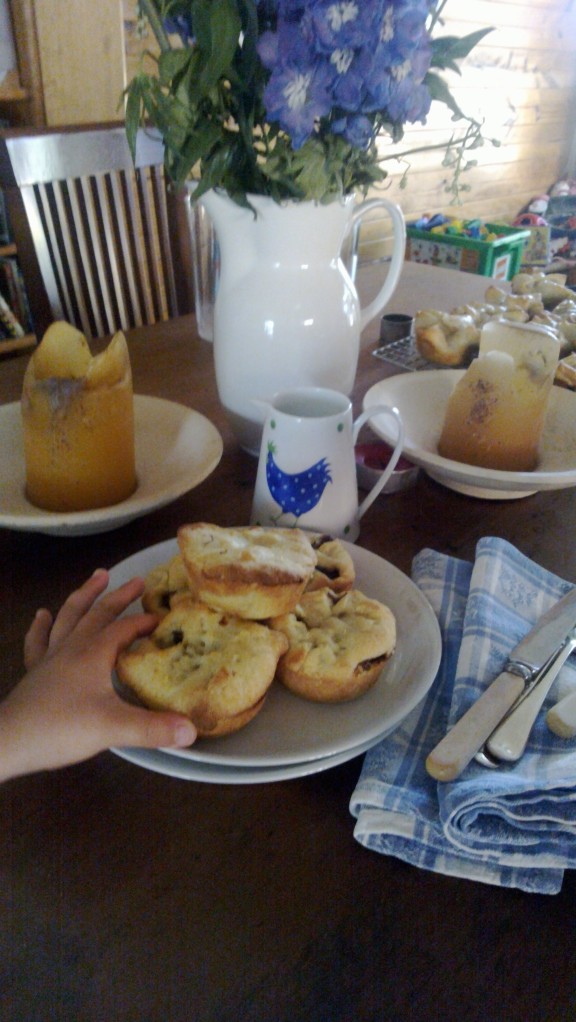
Too yummy to wait

Too yummy to wait

Now me being me, it’s very rare that I will follow a recipe to the T unless I am baking in which case you have to as it’s a bit of a science experiment in getting everything to do it’s thing (another story there). Anyway I went to the butcher but he only had Osso Bucco which apparently is chuck steak with the bone. Which will give loads more flavour so I was in. Then today I am about to get everything ready and realise we only have 1 onion and the recipe says 4… argh! Kids aren’t massive fans of onions, had a bunch of spring onions voila, problem solved. I also left out the Guinness and used extra water instead.

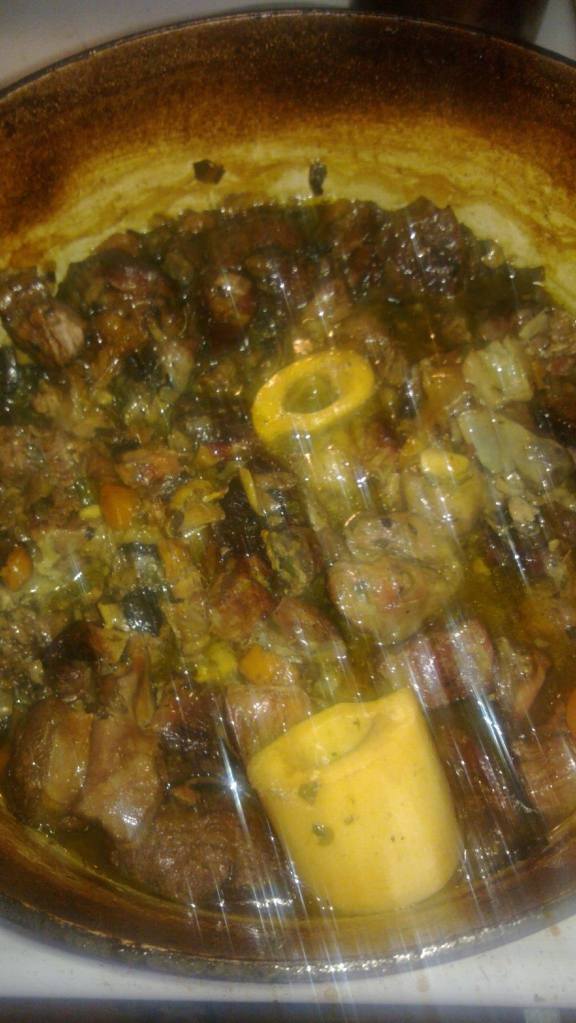
This recipe took the better part of a day to make, but bear in mind, that includes wrangling 2 rascals, hanging out washing, a bit of procrastinating and realising I added too much water at the start. The results though were amazing and I would say if you’re a confident cook then add the extra water, used osso bucco and let it all cook away, especially for those of you in winter as it’ll warm your house too. We ended up with a delicious sticky stew, where the meat melted away and was rich in flavours. Zachie was taste tester and he said it’s perfect Mummy, Mr Maker, Giggle and Hoot tastic! Which in my book equals winner!

Beef, Mushroon & Onion Stew

You will need:

For the pies. 100ml olive oil, plus extra for greasing

1 large red onion, diced

1 bunch of spring onions washed and sliced

4 cloves garlic, smashed and peeled

4 sprigs thyme

3 bay leaves

2 tablespoons plain flour

5 large pieces of Osso Bucco  Approx 1.5kg

Salt flakes and freshly ground pepper

4 medium sized carrots, sliced

3 large field mushrooms, diced

1.5 Litres water (1500 mls or 6 cups)

2 tsp Massel beef stock powder

Maggie Beer’s Sour-Cream Pastry

400g butter, softened

500g plain flour

1 cup sour cream

Method.

Preheat the oven to 180°C fan-forced (200°C conventional).

For the pies, add 40ml olive oil to an enamelled cast-iron casserole, then add the onion, garlic and thyme and cook over low heat (use a simmer mat, if necessary) for 40 minutes or until the onion is soft and translucent, stirring occasionally. Increase the heat to medium-high, add bay leaves, carrots & mushrooms and cook until the onion is dark and caramelised. Add the flour & powdered stock and cook stirring often for 3-4 minutes.
Season the osso bucco generously with salt flakes and ground pepper. Heat remaining 60ml of the olive oil in a large frying pan over high heat, then cook the osso bucco in 2 batches until browned on all sides. Place the osso bucco into the onions and use 2 cups of water to deglaze the beef pan, scraping all the brown bits from the bottom, add to the onions.

Pour enough water to cover the beef and vegetables and bring to the boil. Cover with a tight fitting lid, then transfer to the oven and cook for 2-2.5 hours or until tender.  Now I forgot that the amount of water required to cover osso bucco is more than what you would need to cover chuck steak so after 2 hours there was still heaps of water so I took the lid off and let it cook for another hour and that resulted in the most lovely stew, the meat was off the bone and lovely and sticky. Damn near perfect. Leave to cool to room temperature. Remove the bones and any visible fat and break up the meat with a fork, squash any large pieces of carrot. Refrigerate until cold.

Meanwhile, to make the sour cream pastry, place the butter and flour and a pinch of salt in the bowl of an electric mixer with a paddle or food processor, then blend until the mixture resembles large breadcrumbs. Gradually add the sour cream, mixing until the pastry just comes together. Shape into a disc, then wrap in plastic wrap then chill for at least 30 minutes.
14010152
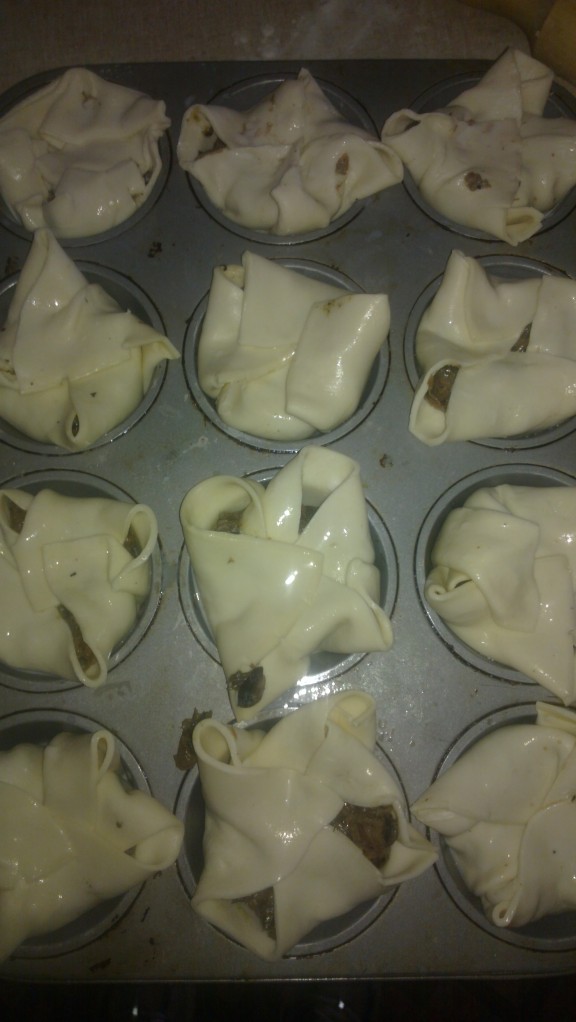
Now at this stage you need to decide what size pies you want, I wanted nibble pie size so I used a muffin tin. I also sprayed it with one of those baking sprays as I am not about to wrestle with the pies to get them out of the tray. The pastry was quite sticky and as I don’t have a cutter to fit them to the size of the tin I did the next best thing. I rolled the pastry out to about 5-10 mm and cut it to fit and then rolled them slightly to make sure they were big enough to sit up over the sides of the tin. Place a spoonful of the meat into the mould and seal, making sure you crimp the edges together. In the end the pastry sat up enough that I was able to fold it over and use that as the lids with little holes in the corners. This will allow the steam to escape.

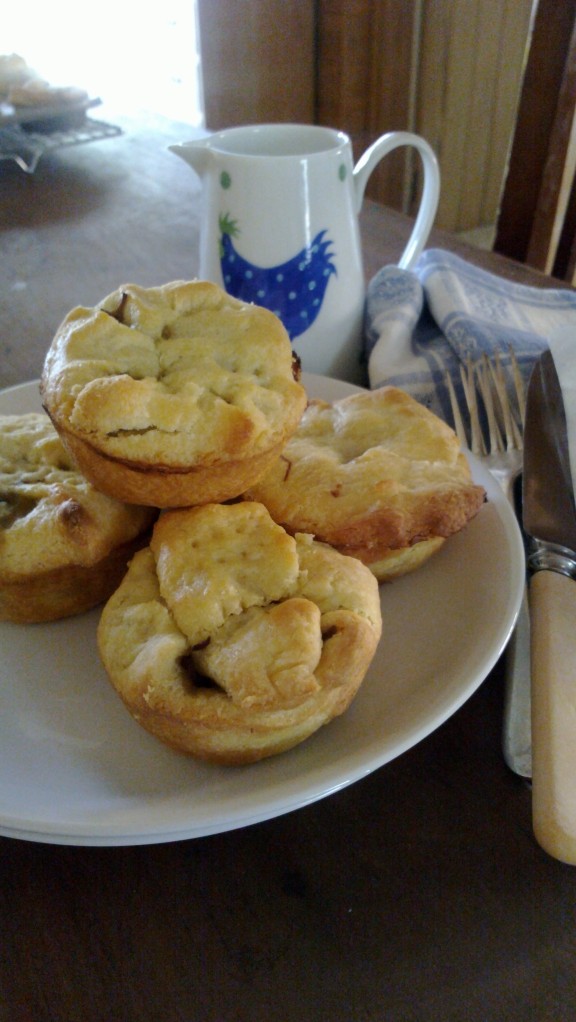
Just before bakingFinished

Brush the pastry tops with egg wash. Bake for 25 minutes or until pastry is golden. Remove from the oven and leave to stand for 5 minutes. Turn out and serve with tomato sauce, if desired.

If like me you’re going to freeze the pies you can cook them until they’re just golden and then remove from the oven.

Beef, Mushroom and Onion Pies

Zachie wasn’t a fan of the pastry, a bit too rich so if you can’t be bothered making your own pastry you can also quite easily use a good puff pastry, which is what I reverted to. I just cut each sheet into 4 squares and waited til they were soft and pliable and folded the corners in over the filling.

This recipe made us 30 small pies. I doubled the quantity for the pastry from the original and if you were using bought puff pastry then you’ll need at least 8 sheets. Also if allergies are a concern you can also leave out the egg and just use milk to brush the pastry before placing it in the oven.

I hope you enjoy!

Panetonne Trifle

Years ago ‘The Age’ published a recipe for a Trifle made from Panetonne, Raspberries and Orange juice. For some reason I always think I haven’t kept the recipe, but I have and now that I’ve dug it out, I remember it was in the Saturday mag which is an insert into the paper. Quite simply this is one of my FAVOURITE desserts! It’s so good, that even though I keep thinking, no, I won’t make it this Christmas, looking at it, I think how can I not?

I leave out the alcohol and don’t bother with the Meringue and use whipped cream instead. But I will give you the full recipe and you can decide what you prefer.

1356409016298

You will need:

1 cup sugar

1 cup water

500g Raspberries (Frozen is fine) – you can also use a mix of berries, but the raspberries are gorgeous.

2tbs maraschino liqueur

zest of 1 orange

1kg Panetonne sliced into 1-2cm rounds (1/2 an inch) – you will find these at any good Italian grocer, the market etc and in Australia you should get a very nice one for no more than $10 I go for one with sultanas etc in them.

Crema Pasticcera

8 egg yolks

250g Caster sugar

100g plain flour

1 litre milk (1000mls) 2.11 USA pints according to Google

1 vanilla bean split

Meringue

6 egg whites

1 cup caster sugar

What to do:

Heat the sugar and water in a small saucepan until the sugar has dissolved. Cook until syrup has reduced to about a cup. Remove from the heat and add a handful of berries and the liqueur, mix well and set aside.

Cut the remainder of the berries into small pieces and mix with the orange zest. If the raspberries are small or you’re using frozen berries you won’t need to cut them up.

To Make Crema Pasticcera:

Whisk the egg yolks and sugar in a stainless steel bowl for 5 minutes until creamy, add the sifted flour and stir until smooth. Heat the milk and vanilla bean in a saucepan to just before boiling point. remove vanilla pod, then slowly whisk the hot milk into the egg mixture. Return the mixture to the saucepan and whisk until thick over a steady heat – Do NOT walk away! Allow the mixture to cool for 2 minutes before removing it from the stove. Place the Crema Pasticcera (Custard) into a clean bowl and cover with a piece of baking paper that is tucked down into the bowl, touching the custard which prevents the formation of a skin, refrigerate until cold.

To Assemble:

I think ideally you want to assemble the trifle in a glass bowl so you can see the layers. Place a layer of panetonne around the bottom of a large bowl, then pour over 1/2 the berry syrup. Place a layer of custard over the panetonne and then some of the berries and repeat the layering process until you have used up all your ingredients.

To make Meringue:

Whip the egg whites and sugar until they form stiff peaks. Pipe or spoon the meringue over the top of the last layer in the bowl and run a flame torch over the meringue till it begins to colour. This is where I substitute the meringue for whipped cream, not because I don’t have a blow torch, but because it’s already RICH enough and I am always a bit hesitant about whether the meringue will be cooked.

This would easily serve 8-10 people, as it’s really rich and we always have leftovers which are very yummy for a boxing day breakfast 😉

Birthdays are FUN

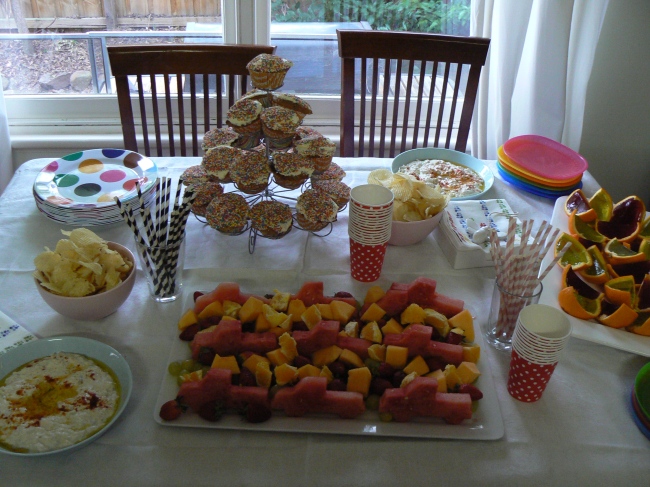
Tomorrow is Zachie’s 5th birthday so we had a party for him on the weekend and it was a rip roaring success. He was in heaven seeing all his friends in the one place, declared they’re all his BEST FRIENDS! I went the traditional route of pass the parcel and hide and seek but for the most part the kids just played and had fun.

Image

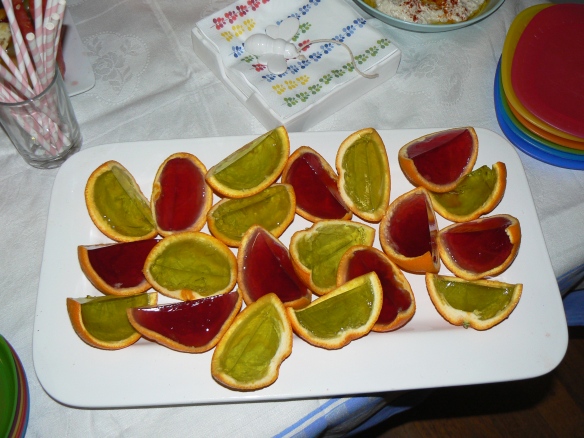
On the menu there were funfetti cup cakes  which I have made before and my helpers do love to put the 100’s & 1000’s on them. A fruit platter with Truck watermelon, Little Sausages in pita bread, and slow roasted lamb souvlaki with Baba ganoush and Tzatziki. Jelly Oranges & a Prime Mover Road Train birthday cake!

Truck Watermelon

Just like my Mummy used to make :)

Just like my Mummy used to make 🙂

I wanted to be able to prepare almost everything but I thought it would be fun for the kids to be able to make their own little souvlaki. So I roasted two mini lamb legs and served them with some roasted potatoes and all the bits that go with them.

Needless to say I got a mouthful, hubby reported it was all fantastic! 😀

Slow Roasted Lamb

You will need

2 mini lamb roasts (or 1 big one)

2 large cloves of garlic, sliced

50 g butter

handful of fresh oregano, chopped

Juice of 2 lemons

Olive oil

Salt & Pepper

250 mls of water

4 large potatoes, peeled and cut into medium chunks.

Preheat your oven to 220 degrees Celsius. Make a couple of incisions in the lamb and slot in some of the garlic, put the lamb into your roasting pan and season, sprinkle over the oregano, remaining garlic and pour over the lemon juice, olive oil and add the water to the bottom of the pan. Put the butter in knobs over the lamb and roast for 15 mins on each side.

Then turn the oven down to 160 degrees Celsius, add the potatoes to the pan and toss in the juices and cover and bake for at least 2 & 1/2 hours or until done. You want the lamb to literally fall off the bone and be able to break it up with a fork.

Baba Ganoush

This is really too easy for words, once you’ve made it a couple of times I think you can play around with the quantities and be guided by your tastes. I used 3 medium size eggplants to make enough for 20 people.

You will need:

3 medium eggplants

1 large clove of garlic

1/2 cup tahini

400 mls natural yoghurt

Juice of 1 lemon

Olive oil

smokey paprika

Place the eggplants over the gas burner on your stove and allow them to “Cook” for 10 mins on each side or until they start to collapse in on themselves. It’s important to keep an eye on them though. Once they’re charred all over remove from the heat and place in a plastic bag and allow to sweat for 10 mins.

Then carefully remove the skin from the eggplant, you need to make sure that none of the charred skin remains otherwise your dip will taste burnt rather than smokey. Set the eggplant aside.

In a mortar and pestle crush your garlic with 2 tsp of salt, then add some of the eggplant (this depends on the size of your mortar) you can fork it as well, but you want it chunky and not completely smooth. Transfer the mix to a large bowl and add the tahini, yoghurt, any remaining eggplant and lemon juice.

Mix well and pour into your serving dish/bowl. Make a little well in the centre and pour over some olive oil and sprinkle with a small amount of paprika.

Prime Mover Birthday Cake

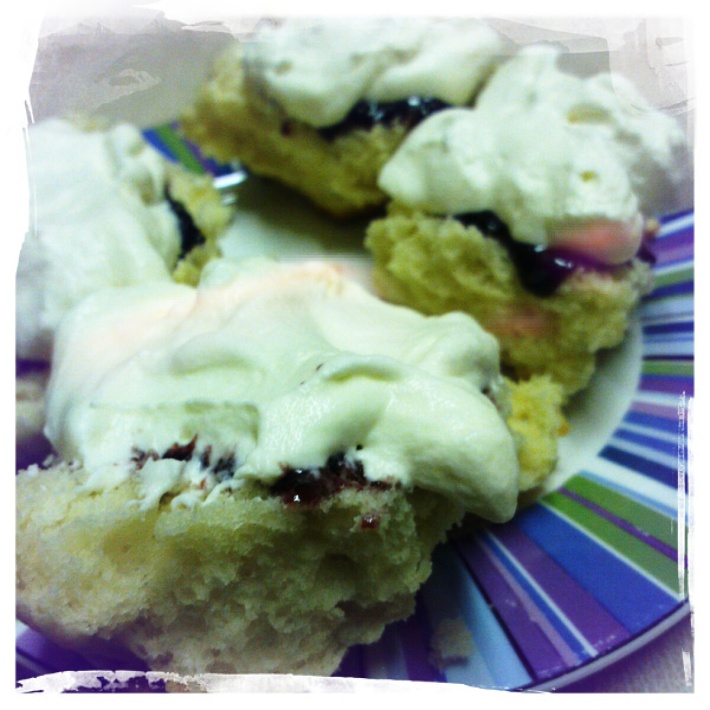
Who doesn’t love a scone?

We had a catch up today with our Mother’s Group, we have been meeting for nearly 5 years and are still going strong. A very dear friend & colleague gave me her scone recipe (The English Scone) it is without question the easiest and least time consuming recipe ever!

Image

I am sure my darling Jeanma (Dad’s Mum) would be none to impressed that there is no butter in this recipe, but I tell you even the purists would go for these. So thanks Paulina, You ROCK!

You will need

3 cups of self raising flour

3 tsp sugar

a pinch of salt

1/2 cup cream

1.5 cups milk.

METHOD:

PREHEAT oven to 220 degrees. Put all dry ingredients into bowl, whisk for a few seconds using a hand whisk. Add cream and milk, stir LIGHTLY using a thin spatula or knife ( the less you mix, the lighter and fluffier the scone) Pour sticky dough onto a floured board. Sprinkle some flour on top to prevent your hands sticking. Pat dough lightly to even it out. Dip your scone cutter into flour and cut out scones. Repeat to prevent dough sticking to cutter.

Put them together on a baking sheet if you want ‘pullaparts’ or place them separately if you want individual, crusty topped scones.

Cook for about 11 mins until hollow sounding when tapped. Take out of oven, cover with a clean tea towel until ready to serve with whipped cream and good quality jam.

Note: This mix is really really sticky, have faith it does work, I have played around with it just a little and because it’s so wet I get two dessert or soup spoons and make rough quenelles and spoon the mix onto a lined tray and end up with pull a parts.

Sensational is an understatement!

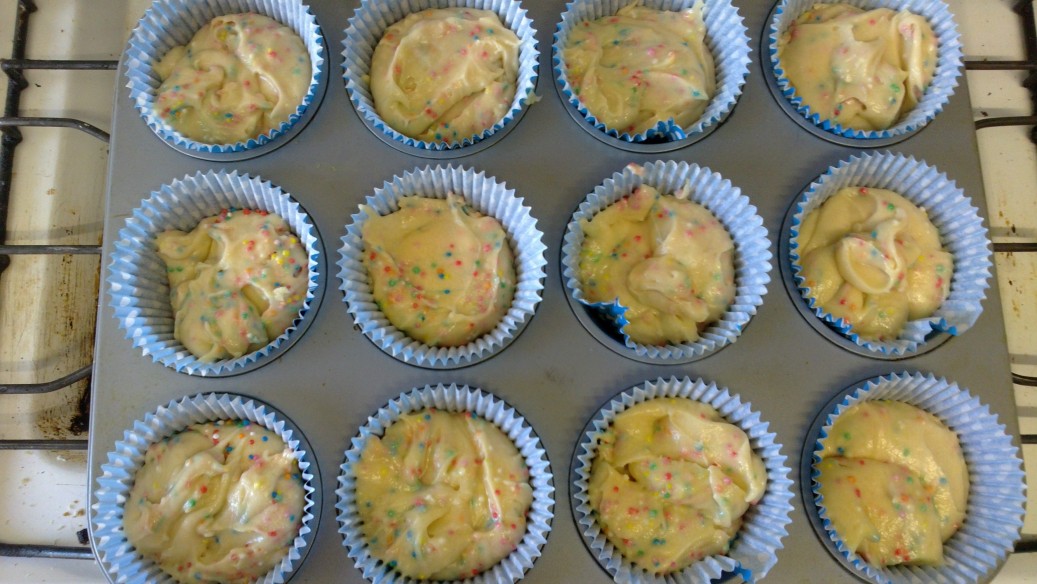
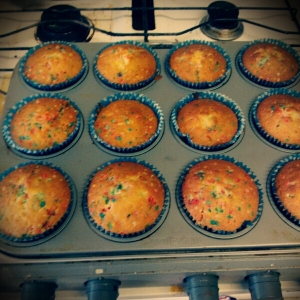
100’s & 1000’s Cupcakes aka Funfetti Cupcakes

I have seen a few images of these cakes or cupcakes around since joining Pinterest a while ago and thought they look amazing and delicious and would be great for birthday parties – bit of frivolous fun.

Zachie’s birthday was earlier in the week and when I was thinking about what we’d have at the party I asked him what he’d like and he went through a list of his favourite foods, cheese & chutney sandwiches, cucumber, carrots etc and cakes, red, blue, yellow, green and so on. Now while I am a bit of a whizz in the kitchen I wasn’t about to make a cake in every colour of the rainbow which is where the 100’s & 1000’s cupcakes came into play. I’d already decided on the chocolate cake for his actual birthday cake and thought I need to find a recipe for cup cakes.

The hunt began – Google has lots of ideas, but they all seem to use a packet mix and that is so far from my style it’s not funny! I then found Sweet Peony Blog who had a recipe for home made cup cakes – which looked like it would for the most part work, so we had a trial run and Voila! They’re delicious, I doubled the quantity for the party as I wanted 24 cakes and when I tried it intially I got 12 fairly perfect little cakes, I topped them with Vanilla Buttercream Icing as she suggests, but it was way too sickly sweet even for my taste buds. I have iced my cupcakes with a Lemon cream cheese icing which was perfect with just the right amount of sweetness without going over the top. Below is the recipe which I doubled to make 24 cupcakes you can halve it if you only want 12.

You will need:

450g or 3 cups plain flour
2 teaspoon baking powder
210g or 1 cup butter
450 g or 2 cup sugar
4 eggs
3 tsp vanilla extract
175ml or 2/3 cup milk
1/2 cup 100’s & 1000’s

Pre heat your oven to 180 degrees celsius or 350 farenheit & line a 12 cupcake tin with patty pans or cupcake liners.

Cream the butter, sugar & vanilla until it’s light & fluffy and the sugar is completely dissolved. Add the eggs one at a time ensuring that you beat well after each addition, Sift the flour & baking powder over the butter mixture and as you start to mix this slowly pour the milk in and beat well to combine, remove the beaters, scrap off the excess and very gently fold in the 100’s & 1000’s – you need to do this carefully as you don’t want the dye from the sprinkles to come off, if this happens they will taste great, but you will end up with the cupcakes being a funny colour.

Divide the mixture evenly between each cupcake in the tins & bake until golden or a toothpick comes out clean. Remove from the oven and allow to cook for 5 mins in the tin before moving to a cooling rack.

For the Icing you will need:

125 g Butter softened

125g Cream Cheese, softened

1 1/2 cups of pure icing sugar, sifted

Juice of 1 lemon

100’s & 1000’s for the tops.

Cream the butter, cream cheese and sifted icing sugar together, add 1/2 the lemon juice and check the consistency, if it’s really thick still you can add some more lemon juice, if you feel that you have added a bit too much lemon juice and the icing is too runny, you can add another 1/2 a cup of icing sugar. You can also refrigerate the icing for 20 mins or so so it thickens up again.

Spread the icing over the cupcakes with a pallet knife and decorate with the 100’s & 1000’s.

Chocolate Cake

Image

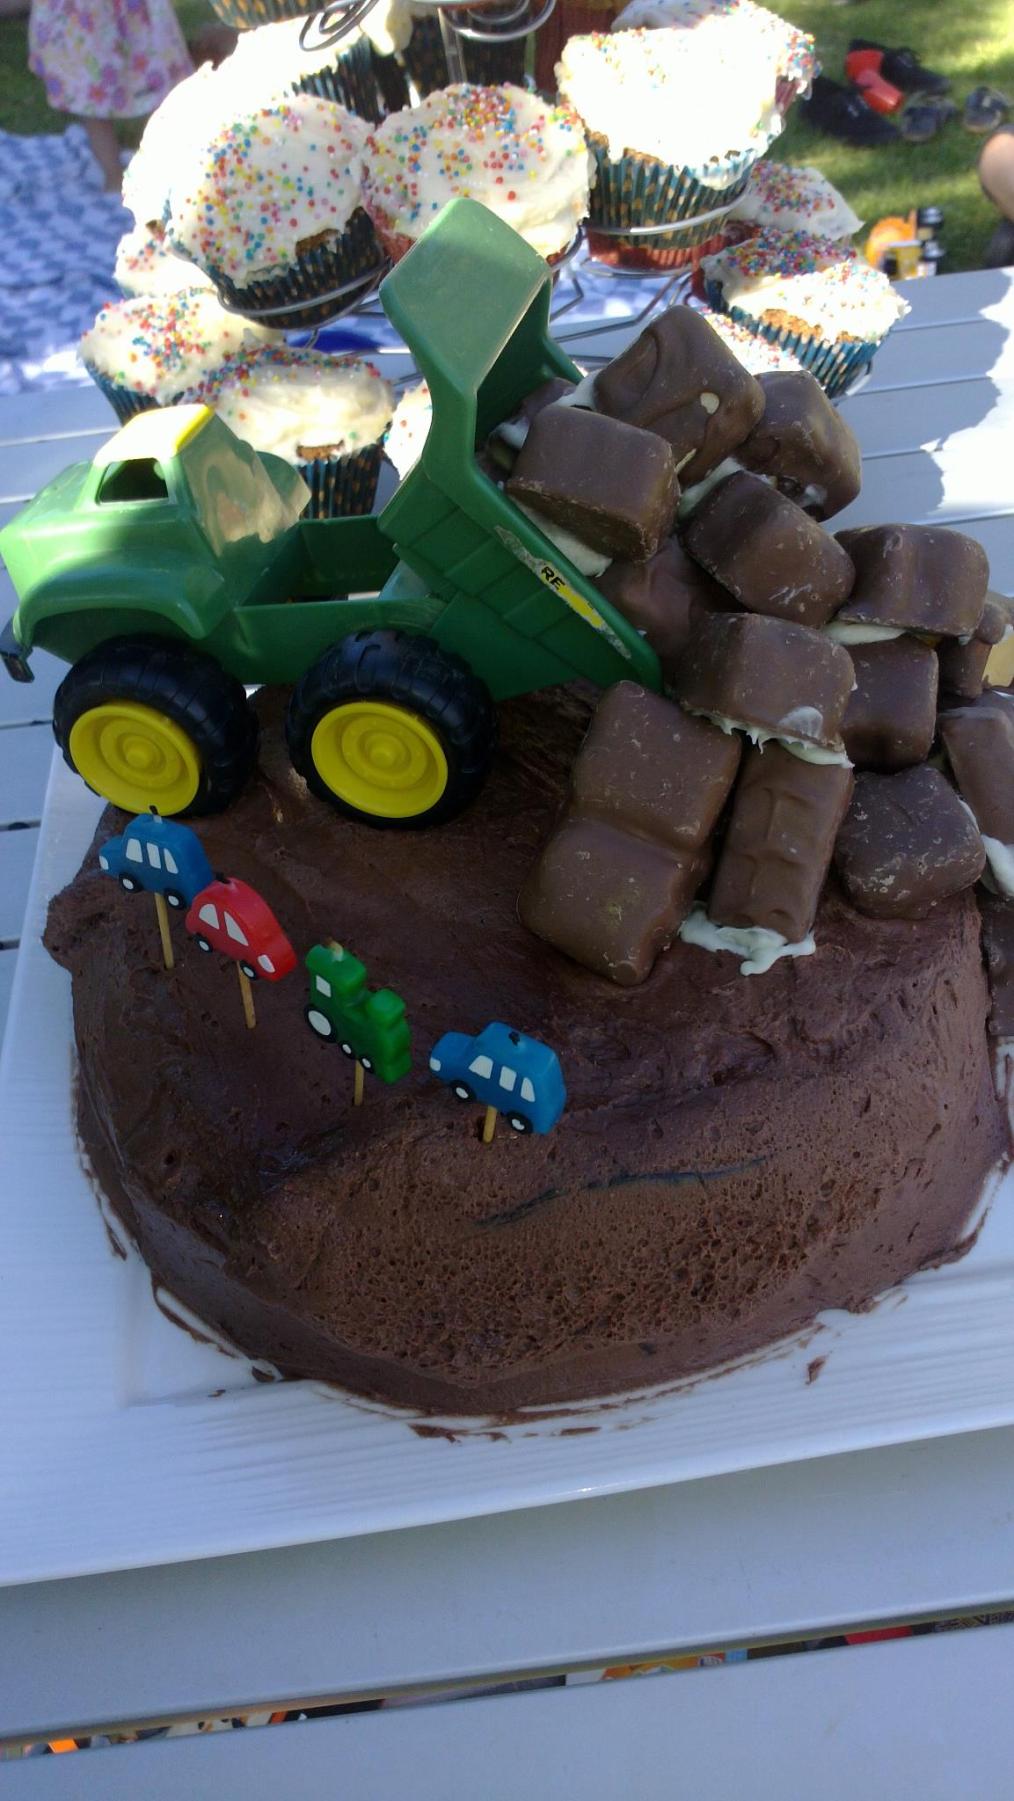
So tomorrow is our son Zachie’s 4th birthday, we had a party for him today at Hays Paddock, a fantastic park in Kew East, there is an enclosed section which has an adventure playground and loads of room to run around, there are a couple of ovals as well just to make sure there is enough space for just about everyone!

It’s autumn here in Melbourne and we had a glorious day of sunshine & cool breezes without a cloud in the sky. I saw a cake similar to the design I made and always thought it’d be great for our boy who loves everything to do with trucks and construction.

You will need

250g Butter

400g Sugar

250g Self Raising Flour

50g Cocoa

1 tsp Vanilla

200ml Milk

4 Eggs

Pre heat your oven to 170 degrees Celsius.

Cream the butter & sugar until it’s light and fluffy, add the eggs one by one beating well in between. Sift the flour & cocoa and add to the mix, while slowly beating pour in the milk, mix well for about a minute and ensure it’s all combined.

Grease & line a 26 cm spring form or round tin, pour the batter into prepared tin and bake at 170 degrees Celsius for approx 40 mins or until a skewer comes out clean.  Allow to stand in the tin for 5 mins or so and then remove and allow to cool completely.

You could leave it at that, but I made some chocolate butter icing, for which you’ll need 250g butter softened, 3 cups pure icing sugar and a tablespoon of cocoa, make sure you sift the icing sugar to remove all the lumps and add to the butter after you have creamed it and it’s light and fluffy, also add the cocoa.

I used violet crumbles & small snickers bars as the rocks, violet crumble is chocolate covered honeycomb.

Enjoy & happy happy birthday my darling boy – I love you right up to the moon and back and up again and back! xxx Mumma

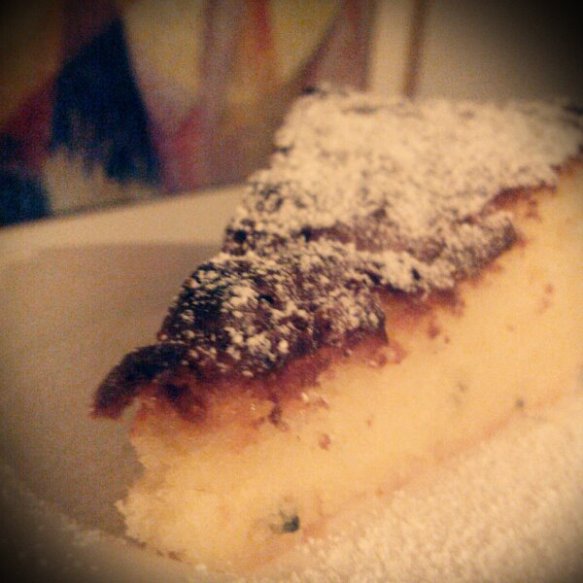
Passionfruit Cake

Delicious? Yes it is and oh so easy to make.. Light, fluffy and something you could easily whip up in no time… I promise!

You will need:

250g Butter

400g Sugar

1tsp Vanilla extract

2 large ripe passionfruit (the Pulp only)

4 eggs

300g Self Raising Flour

200ml Milk

What to do:

Pre heat your oven to 170 degrees celsius or 320 farenheit. Grease & line the base of a spring form tin, measuring 26cm.

Cream the butter, sugar & vanilla until it’s light & fluffy and the sugar is dissolved. Add the eggs one at a time and beat after each addition. Add the passionfruit pulp, mix and then slowly add the milk beating on a very low speed, then spoon in the sifted flour, mix well, but not too much, say for a minute or so. Pour into the prepared tin and bake for approx 40 mins.

Would go beautifully with some passionfruit icing as well and whipped cream on the side, but hubby isn’t a fan of icing so I went with icing sugar (powdered sugar).

Enjoy! xx

Simple Sushi

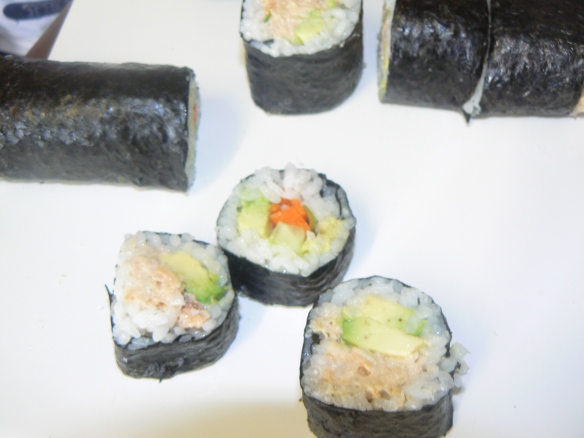
Well this is definitely one to get your kids onto. I couldn’t believe how easy it was to make sushi or california rolls as the larger ones are known here. Zachie & I went to the supermarket and bought Sushi rice, one of those bamboo mats you use to roll up the sushi, some nori paper and the vinegar that you use to flavour the rice.

We already had tuna, cucumber, carrots, avocado etc to use as fillings so we were all set to have a go – now the first attempt I have to say was very impressive. I did undercook the rice slightly, but it was okay, there is certainly a reason they call it sticky rice.

So I simply followed the recipe on the packet of rice, which pretty much says to cook a cup of rice in 375 mls of water, you have to rinse the rice first, bring it to the boil and simmer for 10 mins then let it sit for 10 mins.

Then transfer it to a plate and add about 3 tbsp of sushi vinegar, stir it around & fan it so it cools down as quickly as possible. Once it’s cold/cool then you’re good to go ahead and use it.

I mixed a tin of plain tuna with some mayonnaise, julienne some cucumbers & carrots, you could also add capsicum & sliced up some avocado.

Just spread the rice over the nori paper to within 2 cms of one edge and right to all the other edges, put your toppings on and roll up. It really is that simple, Zachie had a great time making it & eating it as well!

Definitely something to add to your repertoire if you & your family love sushi!

Pizza Perfection!

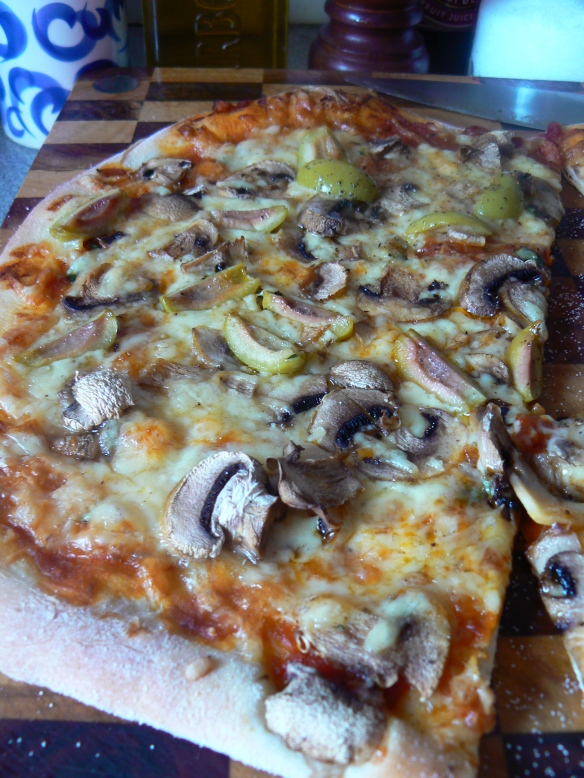
So Friday night came around very quickly last week and I was in the mood to make some pizza, it became a slightly drawn out affair, but that went well for the dough which rose to the occasion perfectly.

I had picked up some bocconcini at the wholesalers and thought…Yep on pizza that will be lovely. We had some left over eggplant from dinner a few nights before, add some freshly sliced mushrooms & olives, home made tomato sauce, cheese and voila dinner is served.

You will need:

For the dough – this amount will make enough for 3 good sized pizzas

25gm fresh yeast or 1 Tbsp of dried yeast

1 tsp runny honey

500g plain flour (if you have it you can use Tipo 00 flour which is great for pizza bases but it’s not essential.

1Tbsp Extra Virgin Olive Oil

2 tsp sea salt

375ml lukewarm water

Crumble the yeast into a bowl with the honey and water, mix well and set aside in a warm place. Sift the flour and when you can smell the yeast and see bubbles or foam on the top it’s ready to add the flour to along with the salt & olive oil. Mix well until it forms a smooth ball (if you have a dough hook on your mixer you are in luck). You may need to add a little extra water or flour, if the dough is too sticky or dry, you want the dough to be soft & slightly stick, but not dry. Cover & leave the dough to prove for at least 10 minutes or until it’s doubled in size.

If you like your pizza bases thin, knock back the dough and divide into 3 pieces, roll out, place on greased trays that have been sprinkled with a little semolina and proceed with your toppings.

If you like a thicker pizza base, knock back the dough and divide into 3 pieces, roll out, place on greased trays that have been sprinkled with a little semolina and set aside to rise for at least an hour in a warm place. Then proceed to top your pizza’s.

For the toppings:

Really it’s up to your imagination & taste buds, I made a mushroom & olive pizza & eggplant & bocconcini. I had made my own tomato sauce with onions & garlic (I had made a lot for a party we had on) but you can quite easily use tomato paste, an italian herb mix or fresh herbs.

Capsicum, Proscuitto, Cheese, olives, artichokes, salami etc, all the standard toppings work, but generally for a traditional italian pizza limit your toppings to no more than 4 not including cheese & tomatoes.

For something a bit different & very special try Buffalo mozzarella & freshly chopped parsley, basil, oregano & thyme with lemon zest & garlic, mix it all together and sprinkle over the cheese.

You want your oven to be as hot as you can get it to start with and then when you put in the pizzas turn it back to about 220 degrees celsius. Cook them until golden and enjoy!

Tips: Don’t forget to season your pizzas with Salt & Pepper, unless you’re using extra salty things like feta & anchovies. Put the cheese on the bottom and for an extra hit of flavour mix tasty, mozzarella & parmesan or pecorino together. If you have a pizza stone use it or buy a couple of terracotta tiles (as per Gary from Masterchef) and use semolina as your base as this really does help to prevent your pizza’s from sticking to the trays, alternatively if you’re making quite a few you can have them waiting to go into the oven on baking paper which makes it much easier to move around and onto the trays.

Oh and did I mention my Dad is building a wood fired oven! 😀